小菜今天想起了去年买的阿里云服务器一直没用过,其实不是不想用。买的时候在网上搜了一下配置教程,反正小菜我是配的乱七八糟,后面一直也没有时间,也就把服务器搁置了半年。最近服务器配置好了,简单整理整理。先奉上前辈教程,向前辈致敬。小菜也是照着一步一步走下来的。
1.远程登录阿里云
远程登录阿里云服务器,小菜这里用的是putty,大家看着用,反正只要登录上去就可以。
2.安装nginx
输入 yum install nginx命令进行安装nginx,需要确定是输入y确认。
3.启动nginx
输入 service nginx start 启动nginx服务
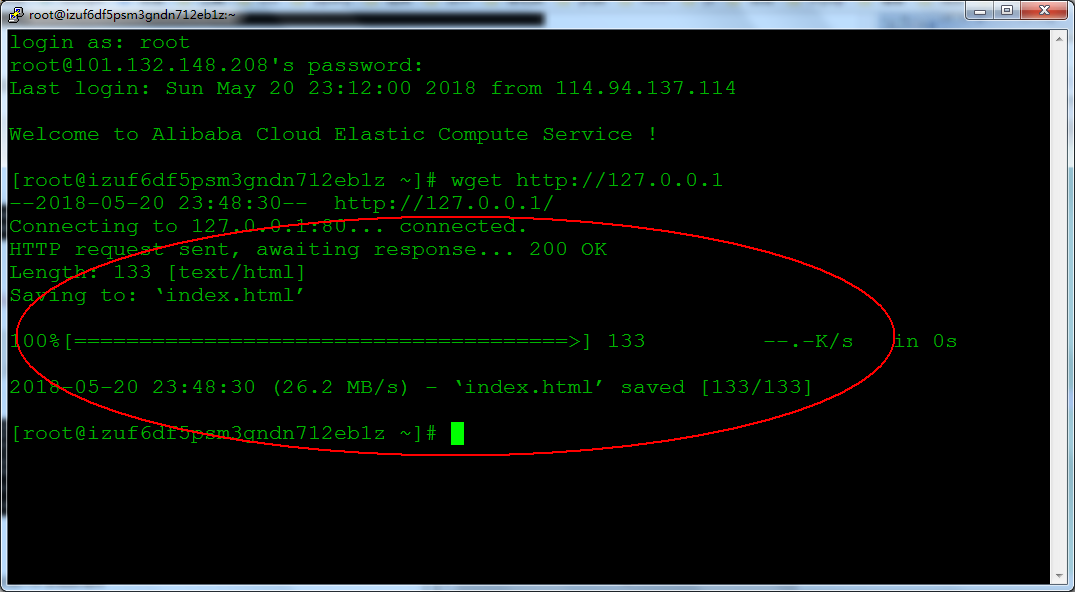
4.测试nginx
输入 wget http://127.0.0.1 测试nginx服务
5.安装php及相应组件
输入 yum install php php-fpm 命令进行PHP的安装,当需要确认时输入”y“确认。
输入 service php-fpm start 启动php-fpm服务,并使用命令cat /etc/php-fpm.d/www.conf |grep -i 'listen =' 查看php-fpm配置
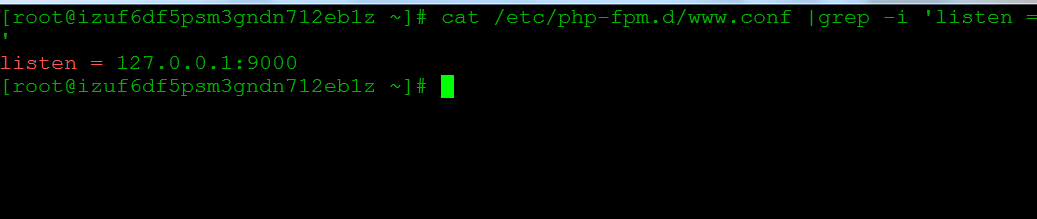
1. service php-fpm start
2.cat /etc/php-fpm.d/www.conf |grep -i 'listen ='
6.修改nginx配置文件
查找nginx配置文件,并使用vim修改nginx配置文件。
1. nginx -t
2. vim /etc/nginx/nginx.conf
在配置文件中找到以下片段,修改#===========部分。(按任意键(或者i键)行文本编辑,以“#”开头的为注释行。编辑完成后,按Esc键,在输入:wq,保存并退出)
server {
  listen       80;                    #===========
  root   /usr/share/nginx/html;       #===========
  server_name  localhost; 			  #===========

  #charset koi8-r;
  #access_log  /var/log/nginx/log/host.access.log  main;

  location / {                        #===========
      index  index.html index.htm;    #===========
  }                                   #===========

  #error_page  404              /404.html;

  # redirect server error pages to the static page /50x.html
  #
  error_page   500 502 503 504  /50x.html;
  location = /50x.html {
      root   /usr/share/nginx/html;
  }

  # pass the PHP scripts to FastCGI server listening on 127.0.0.1:9000
  #
  location ~ .php$ {                  #===========
      fastcgi_pass   127.0.0.1:9000;  #===========
      fastcgi_index   index.php;      #===========
      fastcgi_param  SCRIPT_FILENAME  $document_root$fastcgi_script_name;   #===========
      include        fastcgi_params;  #===========
  }                                   #===========

}
修改保存后,输入service nginx restart重启nginx服务
7.创建一个文件
nginx默认web文件夹
1. cd  /usr/share/nginx/html
2. touch index.html
3. vim index.html
按i,将一下内容黏贴进去,退出保存
<!doctype html>
<html lang="en">
<head>
        <meta charset="UTF-8">
        <title>Document</title>
</head>
<body>
        <h1>hello world</h1>
</body>
</html>
8.访问刚才写好的页面
在浏览器器中输入公网ip,如果页面可以显示“hello world”,说明配置成功。不成功请仔细检查。

如果配置域名也可以直接输入域名进行查看。

小菜这里的协议是https,如果你也想配置https请查看http://waliblog.com/network/2018/05/12/site.html
注意:在阿里云实实例->安全组列表->配置规则->添加规则,查看有没有tcp协议 80端口开放,如果没有开放要手动添加一条规则
| 字段 | 值 |
|---|
| 网卡类型 | 内网 |
| 规则方向 | 入方向 |
| 授权策略 | 允许 |
| 协议类型 | http(80) |
| 端口范围 | 80/80 |
| 优先级 | 1 |
| 授权对象 | 0.0.0.0/0 |
| 描述 | 添加备注 |